Saturday, 24 December 2016

How To Use Your Android Smartphone As Microphone Via Bluetooth Speaker

How To Use Your Android Smartphone As Microphone Via Bluetooth Speaker

The best thing about Android is that it’s completely customizable. There’s almost nothing you cannot change about it., it runs a lot of apps and games. There is no limit to what you can perform on an Android phone. Every Android genuine user is an explorer. They love to explore every nook and cranny of their beloved devices. 

Today I am going to talk about an awesome app that can turn your Android phone into a microphone for the listening pleasure of your audience. When checking Google Playstore you will see numerous applications with similar functions, but Microphone app is our main focused.

There are a lot of apps available by that name so make sure you download Microphone by Wonder Grace developers. The app designed for Android users to be able to use their smartphone as microphone connects to a speaker through Bluetooth. You can control almost all the aspects, using it. First of all, you can control the gain, volume and even the equalizer of the output. It can be tough to get the ideal values at first and you might even hear an echo while using the app, but you will get there eventually. 

Features of Microphone App
  1. Amplifier
  2. Mono / Stereo (Balance channel individually)
  3. Equalizer adjustments
  4. Line-In / Line-Out selection
  5. Sampling rate selection
  6. Widget support (Lock screen and Re-sizable)
  7. Supports Locale / Taker as a plugin
To Connect Mic App With Bluetooth Speaker
Connect your Bluetooth speaker with your Android device and open the app, tap the microphone logo at the middle on your phone screen to ON/OFF the Mic.


The sound might not be perfect at first, but you can always adjust the settings and control to get the desired mic effect.


You can turn on the widget support to make it easier and flexible to use.
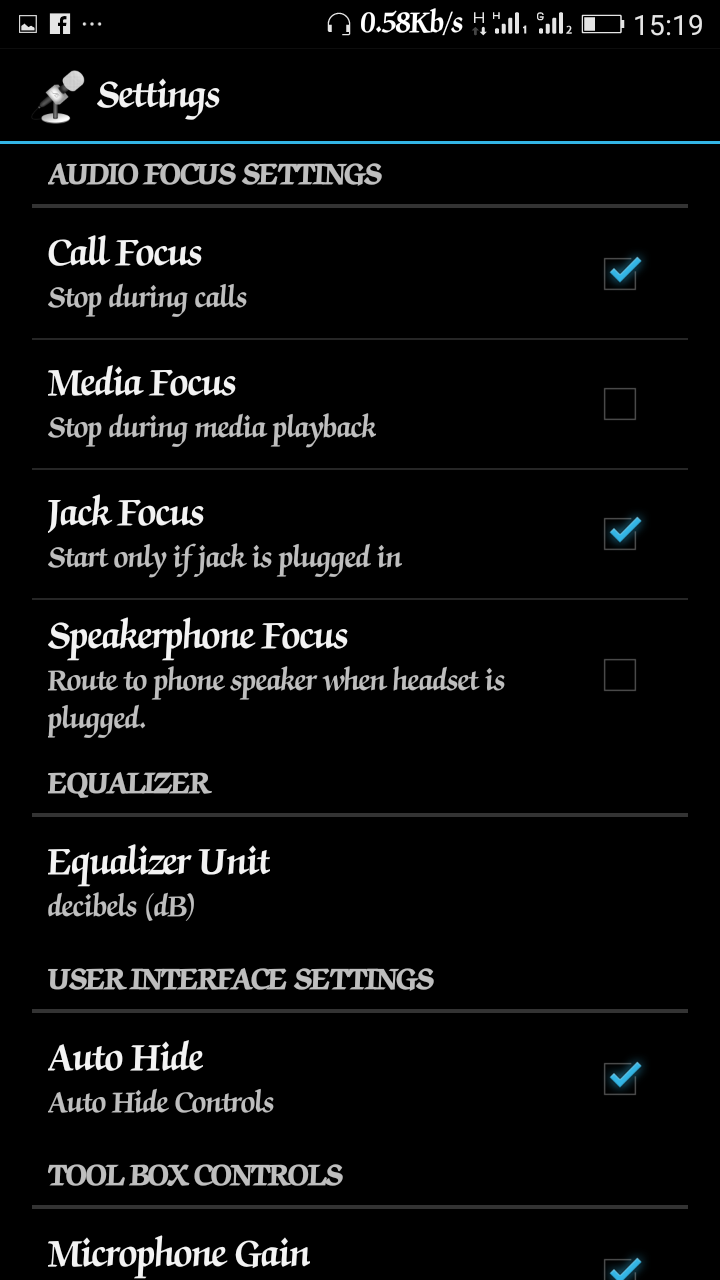

That is all for now on how you can use your Android phone as a real-time mic.

Wednesday, 21 December 2016

How to add Running widget for blogger Facebook, Twitter, RSS, social Truck

How to add Running widget for blogger Facebook, Twitter, RSS, social Truck

How to add Running widget for blogger Facebook, Twitter, RSS, social Truck

How to add Running widget for blogger Facebook, Twitter,  RSS, social Truck like this below

As a blogger you must have a social profile is must and I hope you have?
HOW TO ADD THIS WIDGET

  1. login to your blogger dashboard 
  2. Go to layout 
  3. Add a widget 
  4. Choose HTML/Java Script
  5. Paste the code below in the widget 
<div style="position: fixed; z-index: 65535; left: 0px; bottom: -3px; width:100%;"> <marquee>

<a href="http://www.facebook.com/saso.maxi" target="blank"> <abbr title="Like us at Facebook"><img src="http://farm8.staticflickr.com/7372/10085253495_cddef5ce65_o.png" width="120px" height="100px"/> </abbr> </a>

<a href="http://feeds.feedburner.com/maxisaso/mHnN" target="blank"> <abbr title="Subscribe to Our Feeds"><img src="http://farm4.staticflickr.com/3748/10085253355_967426408a_o.png" width="120px" height="100px"/> </abbr> </a>

<a href="http://twitter.com/maxisaso" target="blank"> <abbr title="Follow Us on Twitter"><img src="http://farm8.staticflickr.com/7308/10085253265_56122fa319_o.png" width="120px" height="100px"/> </abbr> </a> </marquee></div>
Note: change my profile to yours 
Like: Maxisaso change to yours 
Successful.

Sunday, 4 December 2016

How to Temporarily Lock anyone’s Facebook Account

How to Temporarily Lock anyone’s Facebook Account

How to Temporarily Lock anyone’s Facebook Account

How to Temporarily Lock anyone’s Facebook Account. So want to Temporarily Lock or freeze your friend’s or enemy’s facebook profile? then you are at right place! In this article I’m sharing a secret trick with you guys How to Temporarily Lock anyone’s Facebook Account. 

How to Temporarily Lock anyone's Facebook Account
HOW TO TEMPORARILY LOCK ANYONE’S FACEBOOK ACCOUNT

Temporarily Lock anyone’s Facebook Account

This trick is personal tested by me and is working fine!. All you need to do is to make your friend to comment a small link(given below) anywhere on facebook, this may be a hard thing to do lol but you can convince his or her by saying comment this on Facebook to see magic lol 😀 :v 😛 this is the nice way to trap him/her in the rattrap lol as soon as he comments that link on facebook, his or her facebook account will get Temporarily Locked instantly! 😀 Interesting? Excited? then follow the below steps. How to Temporarily Lock anyone’s Facebook Account
NOTE: Don’t use this trick for illegal Purposes, if you do we will not be responsible!

    How to Temporarily Lock anyone’s Facebook Account


    • Go to facebook.com and Login to your facebook account.
    • Send the below URL to your friend and ask him to comment that anywhere on facebook as we discussed above
    http://34255353309
    NOTE: Add space or dot between this URL before sending to your fiend or victim else your account will be locked! Just add space or dot or anything lol in the URL and ask your friend to remove that space or dot whatever before commenting on facebook! 
    • Finally ask your victim to paste that link anywhere after removing that space!
    BOOM! you did it 😀 😛
    How to Temporarily Lock anyone's Facebook Account
    If you like our blog then do share and don’t forget to leave your valuable feedbacks! 🙂

    Friday, 11 November 2016

    How to Stop/Disable Copy-Paste On Your Blog

    How to Stop/Disable Copy-Paste On Your Blog

    How to Stop/Disable Copy-Paste On Your Blog

    For those of us that have have been looking for methods to prevent other people from copying your hard written posts, I will be using this opportunity to teach you guys how to do that through a JavaScript code which you will use to disable copy paste on your blog.


    Now copy and paste this code BEFORE </head> tag in your HTML code..

    <!-- Disable Copy and Paste-->
    <script language='JavaScript1.2'>
    function disableselect(e){
    return false
    }
    function reEnable(){
    return true
    }
    document.onselectstart=new Function (&quot;return false&quot; )
    if (window.sidebar){
    document.onmousedown=disableselect
    document.onclick=reEnable
    }
    </script>


    and that's all your post are now safe...

    I've applied it and tested it on this blog and it is working fine but I had to remove it so as to enable you guys to copy the above code and paste on your blogs.

    How to Create a Static Home Page in Blogger

    How to Create a Static Home Page in Blogger

    When it comes to home pages, most websites can be divided into two: static and non-static. As their name implies, static home pages stay permanent no matter how many times the website is updated, while non-static home pages reflect the changes that are made to the site and show the latest posts first.

    The latter has become well-known nowadays due to the rising popularity of personal and even corporate blogs. However, there are still many people who prefer static home pages because it makes their websites look more organized and professional. It also gives them more control over the readers' experience on their site and helps them create stronger brand awareness through the uniform message that their home page presents.

    Fortunately, if you own a Blogger site and want to make your home page static, you'll find that creating one isn't as difficult as it seems. You can create a static home page in Bloggerby taking these steps:

    static pages in Blogger

    1. Create your static home page

    The first thing you should do is to create a new page for your blog. This will serve as your static home page but, for now, it will look and act like any other page in your site.

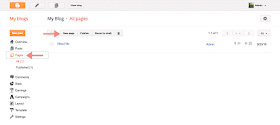
    To make this page, you'll need to go to the main menu of the Blogger dashboard and click on the "Pages" option on the left side on the screen. Doing this will lead you to the "All Pages" menu window. Here, click on the "New Page" button and you'll enter an editor that looks similar to the Blogger Post editor that you use when publishing a new blog post. 

    static home page

    At the top box, enter the title that you want for this page - in this case, let's call it the "Welcome" page. In the larger text box, type the content that you want to appear on your home page; this can be a paragraph, or two about yourself or your business and what your site is all about.


    Once you're done, click "Publish". The window will return to the main "All Pages" menu, and you'll see the new "Welcome" page you've created. Copy the URL of the "Welcome" page since you'll need it later on. To do this, right click on the 'View' link and select 'Copy Link Location' from the menu.


    2. Redirect the default home page to the static one

    Once your "Welcome" page is up, the next thing you should do is to change Blogger's default homepage. This involves redirecting from your site's original home page to the static homepage that you've created so it would be the first thing that people see when they visit your website.


    To do this, you'll need to go to main Blogger editor menu, click on "Settings" on the left side of the screen, and choose "Search Preferences". Under the "Errors and redirections" section, you'll see the "Custom Redirects" option with an "Edit" link beside it. Click on the "Edit" link to open another window, where you'll see two boxes named "From" (with your blog's URL beside it) and "To".


    In the "From" box, enter only a forward slash symbol "/". In the "To" box, paste the URL that you copied earlier and add the latter part of the URL of the "Welcome" page. For instance, the page's URL of our demo blog is static-home-page.blogspot.com/welcome.html, so we'll remove the "http://static-home-page.blogspot.com" address and add only "/p/welcome.html" in the "To:" box. The "/p" signifies that it's a static page.


    Next, check the little box beside "Permanent", click on the "Save" text link, and press the "Save changes" button. Doing these will redirect your site's main URL to its new static home page. Access your blog on a separate browser to see if it works.


    3. Make tabs for your site

    If you're not planning to make tabs visible in your blog, you can stop at Step #2. But, if you want your site to have tabs that indicate the home page, the main blog page, and other pages you may have (such as the FAQs and Contact Us pages), you'll need to take another step.

    Why is this important? Basically, when visible tabs are enabled in your site, they will show that you have two existing pages: the default home page and the new "Welcome" page you've created - both of which redirect to the same static page. This can be confusing for your readers and may even affect your search engine rankings.

    To fix this, you first need to enable tabs by going to the "Layout" menu item and click on the "Add a Gadget" link. You can choose to add it below your blog header or sidebar. In many cases, it's advisable to add it below blog's header since they're more visible and give your website a sleek, professional look.


    Once the pop-up window opens, scroll down and click on the 'Pages' link:


    This will open another window named "Configure Page List". Here, under the "Pages to show" section, you'll see the default home page and your new static homepage with small boxes beside them. Uncheck the box beside the default home page to hide it from view, check the pages that you want to display in the menu and then click on the "Save" button to save the changes.


    You can stop at this point but, if you want, you can also create a specific tab that will lead to your main blog post page. To do this, edit the "Pages" gadget that you just saved and click "+ Add external link".


    On the new window that would open, enter the title you'd like for the page (such as "Blog") along with/index.html web address, then hit "Save Link" and click the "Save" button on the "Configure Page List" window. 


    Now, view your site and you will see the pages menu containing the "Welcome" page and "Blog" tabs.

    How To Drive Huge Traffic To Your BlogBlog In A Week

    How To Drive Huge Traffic To Your BlogBlog In A Week


    In this article I would like to share with you some of the best ways to increase blog traffic and build backlinks !


    It’s very easy to set up a blog, but hard to build a great blog with a great amount of traffic, traffic is the key of a successful blog, without traffic you can’t expect to earn anything. here are some tips on how to increase traffic on your blog:

    Best ways to drive huge traffic to your blog !

    1 – Write well and often, try to update your blog at least every week.

    2 – Set up a Facebook page for your blog.

    3 – Comment on commentLuv enabled blogs.

    4 – Write and submit articles to the best article directories such as Ezine articles and acme articles.

    5 – Submit your blog to blog directories such as Bloggers and Bloglog.

    6 – Write guest posts on sites with high traffic and related to your niche.

    7 – Drive targeted traffic to your site by writing on Squidoo or hubpages.

    8 –  If you visit a blog on your niche don’t forget to comment and make sure you add a link back to your blog as a signature.

    9 – Join and take part on forums be active and make sure you add your blog URL in the signature form.

    10 – Set up a mailing list or newsletter for your blog using a free and useful tool called Mail chimp.

    11 –  Make YouTube videos for your posts and get free targeted traffic.

    12 – Share your posts to Facebook and twitter.

    13 – Submit your blog to Bing Google and Yahoo Directory.

    14 – Submit your Blog to press release sites such as Free-press-release and PrFree.

    15 – Join  the best blogging communities such as blog engage and blokube.

    16 – Optimize your articles for SEO (title, description, keywords, headers…

    17 – Tweet your articles to your followers.

    18 – Call per action, always ask your readers to take actions like telling them to subscribe to your mailing list, asking them to follow you on twitter or just liking your Facebook page.

    19 – Always reply to the comments on your blog to make your readers feel that you care on them.

    20 – Give your readers freebies and giveaways every month like free E-books, downloads award the top commentators and encourage them to visit your blog more often.

    21 – Run contests and giveaways on your blog and Increase your blog  traffic and backlinks.

    22 – Interact and make relationships with other bloggers.

    23 – Make sure that your blog design rocks , so your readers will love your blog.

    24 – Convert your article into pdf and share them on document sharing sites like scribd.

    25 – Join Facebook  group and promote your article every time you post.

    26 –  Join the best social bookmarking sites and promote your blog on them.

    27 – Always try to improve your writing style so you can write better content that your readers would enjoy.

    How to Add AdSense Page-level ads in Blogspot

    How to Add AdSense Page-level ads in Blogspot

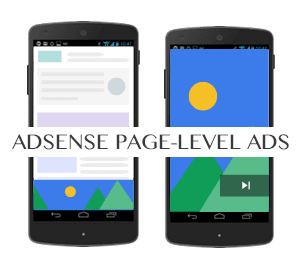
    Recently, page-level ads were made available for blogspot bloggers and webmasters which means that you can now display AdSense Ads right on your mobile templates. You can now monetize your efforts on the templates as you do with mobile apps thanks to the Google Admob Ads.

    Why Choose AdSense Page-level ads?

    There are a number of reasons why you choose page-level ads from AdSense to bolster your revenue stream.
    • Increase Revenues
    • Provide Better User Experience
    • Two New Formats
    • Doesn't Count Against 3 Ad Limit
    • Optimized and Responsive to Mobile Needs

    Page-level Ad Formats

    Today, the two types of page-level ads available include Anchors which are ads places at the bottom of the screen and Vignettes which are full screen ads that work similar to Admob's Interstitial adverts.
    Vignettes tend to be more effective for mobile advertising.

    how to add adsense page-level ads in blogspot

    How to Setup Page-Level Ads in Blogspot Blogs

    The good news is that you can install these ads from AdSense fairly quickly and easily thanks to the process which guides you through.

    1. Log into your AdSense Account
    2. Click on this link
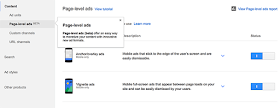
    3. Click the two toggle buttons to switch on "Anchor/overlay ads" and "Vignette ads"

    enable adsense page-level ads in blogger

    4. Scroll down and click the "Get Code" button

    enable adsense page-level ads in blogger

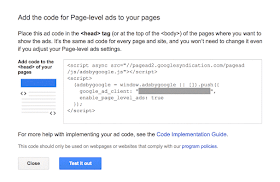
    5. Copy the code

    google adsense page-level ads code

    6. Go to Blogger, then Template and Backup your Template
    7. Click the 'Edit HTML' button and search for the </head> tag
    8. Paste the page-level ad code above the </head> tag

    Note: You will also need to replace the attribute async withasync="async" in order to help complete the process, otherwise Blogger will give you an error message. Once you have completed these steps, all you need to do is save it to your template.

    Test Page-level ads in your Blogger template

    After installation, get out your mobile device so you can test the AdSense page-level ads and see if they are working correctly. You will need to be a visitor to your site in order to check out the ads.
    • Type #googleads at the end of the URL so you can access them
    • Select the ad format from the tabbed box that will appear above the body of the blog
    • Check out the ads
    You will get to see the ads in action before the public does so that you can tell if they are working fine. If you are impressed with what you see, then it is ready to go. However, if you see something that you want to change or if the ads are not present, you'll need to start over again.

    The Effectiveness of Page-level ads

    Since October, 2015 when these ads were first rolled out the effectiveness that they have demonstrated is considerable. Today, the ads have been used in countries all over the world and they continue to impress. For those who have already used these mobile ads on WordPress or other blogger blogs you can see just how effective they have been in terms of reaching all of your visitors. In addition, the effect on your revenue may be considerable depending on the popularity of your blog.